
I'm often get ask what kind of surfaces I shoot on or against and thought I would show some of the "Fake" wood floors I have. When I say "Fake" I mean the illusion of a wood floor or wall. I use real wood but distress the wood to look old by using a "Dry Brush Effect". Here is some work for that "Look" from my gallery in a past life(just over 15 years before going full-time as a photographer) as a Decorative Painter!
It doesn't take large pieces of wood to create the look of a floor or wall and it's not hard to put them together. I prefer pine because it's easier to work with so all you have to do is purchase 4 of or 5 pieces and assemble then with smaller strips in back with screws(I like to use drywall screws). You can also use stain to darken the wood then distress to give an antique, well worn look for image themes!
 I also use both sides and it's very economical.You can create two different wood surfaces in totally different color tones and techniques! It is limitless what you can create and it can help you be very creative in your future image shoots. Here is another image showing what I mean:
 I hope this gives you ideas to create some panels and wood surfaces of your own!
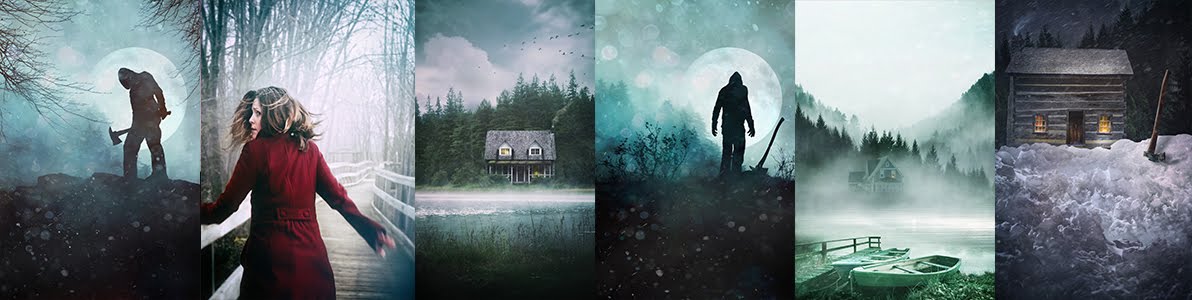
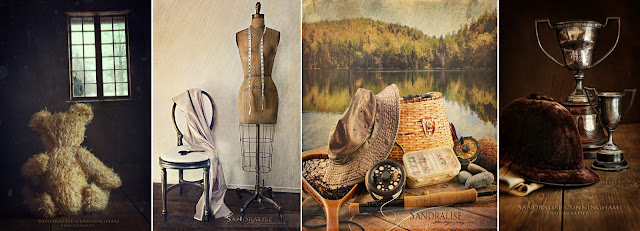
Here are some images using these wood creations:

It doesn't take large pieces of wood to create the look of a floor or wall and it's not hard to put them together. I prefer pine because it's easier to work with so all you have to do is purchase 4 of or 5 pieces and assemble then with smaller strips in back with screws(I like to use drywall screws). You can also use stain to darken the wood then distress to give an antique, well worn look for image themes!


Here are some images using these wood creations:


"Dry brushed" surfaces age so well in Photoshop! may it be cement or wood. And gray is such a brilliant idea - can easily shift it to many other colours. Thank you for the beautiful photos of your "trade tricks". The results are certainly worth the effort. I got an old blue enamel painted door, but enamel is hard to process in CS, but still its beautiful & doublesided :)
ReplyDeleteThanks Luba!
ReplyDeleteYou are so right about aging surfaces in PS. There is so much you can do!
There are fantastic products on the market today that
can prepare an enamel surface for repainting.
Once you sand the door or surface and put on this special paint primer
you are good to go and can paint anything you want on that surface.
Happy painting!
thank you for the tip! now i know what to do with other hospice shop finds. My door won't handle much anymore. It's falling apart as it is, very dramatic and with character :) Love your doll series - a bit sad but masterfully done.
DeleteYour behind the scenes shots show how creative you are as a stylist and set builder in creating great settings. Beautiful work.
ReplyDeleteThank you very much for such a great compliment!!
DeleteHi Sandra, found your blog via Shoots.co.za. Thanks for the explanation on how you made your panels and doors. I'm busy making mine, thanks to you.
ReplyDeleteI found some info on the web and thought I would share with you as well.
http://www.younghouselove.com/2011/04/making-new-wood-look-old/
Thanks again, Love your blog and keep up the good work.
Ta Deneys
Thanks so much Deneys and glad you found it useful! The link was very interesting and informative!
ReplyDeleteSandra :)
Wonderful, Great to see your blog. It's a nice topic. Glad to see it was all good. Thanks to share for this blog ........
ReplyDeleteYour very welcome!
ReplyDeleteThey are brilliant fake flooring effects! :) Thank you for sharing that beautiful transformation taken from your superb shots.
ReplyDeleteYour quite welcome!
ReplyDelete